Install XAMPP on Ubuntu Server
Step 1: Start the Process
Login to Ubuntu machine using any ssh client (like putty or mobaxterm or gitbash) or it’s great if you have a direct access to the Ubuntu machine
Step 2: Download XAMPP
Download the XAMPP installer from the official Apache Friends website using wget:
wget https://www.apachefriends.org/xampp-files/8.2.12-0/xampp-linux-x64-8.2.12-0-installer.run
Step 3: Change File Permissions
Make the installer executable by running:
chmod +x xampp-linux-x64-8.2.12-0-installer.run
Step 4: Install XAMPP
Run the installer with superuser permissions:
sudo ./xampp-linux-x64-8.2.12-0-installer.run
Step 5: Start XAMPP
To start the XAMPP server, use
sudo /opt/lampp/lampp start
This starts Apache, MySQL, and other components.
Step 6: Test XAMPP
Open a web browser and navigate to:
http://ip-add/dashboard

Step 7: Let’s check the phpmyadmin console:
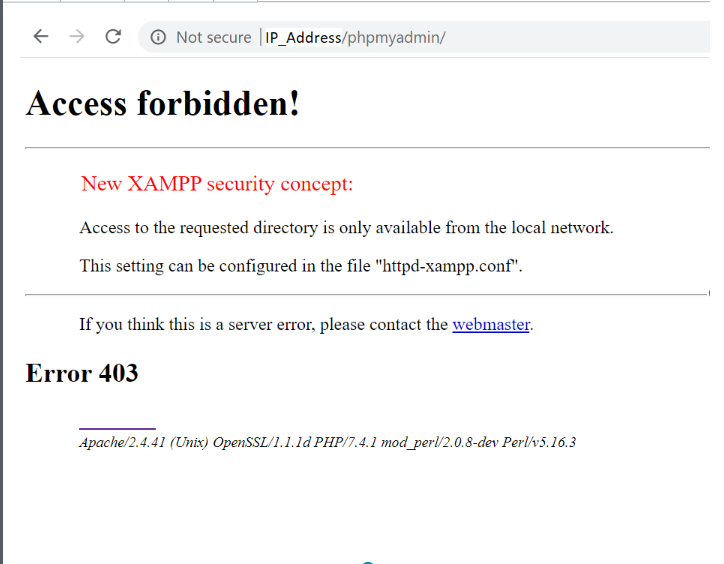
Step 8: solve the phpmyadmin access forbidden problem now
sudo vi /opt/lampp/etc/extra/httpd-xampp.conf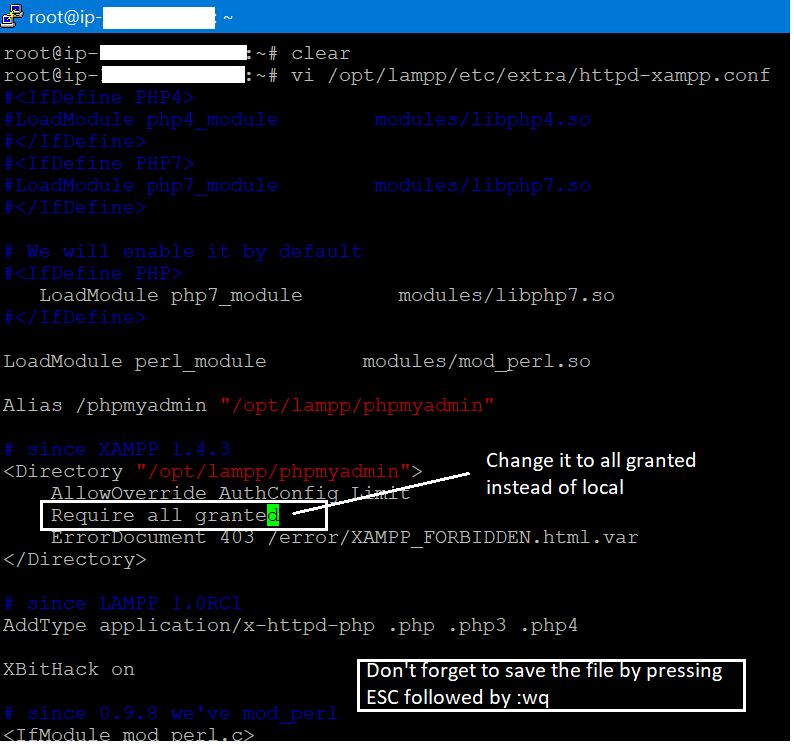
Step 9: Restart XAMPP
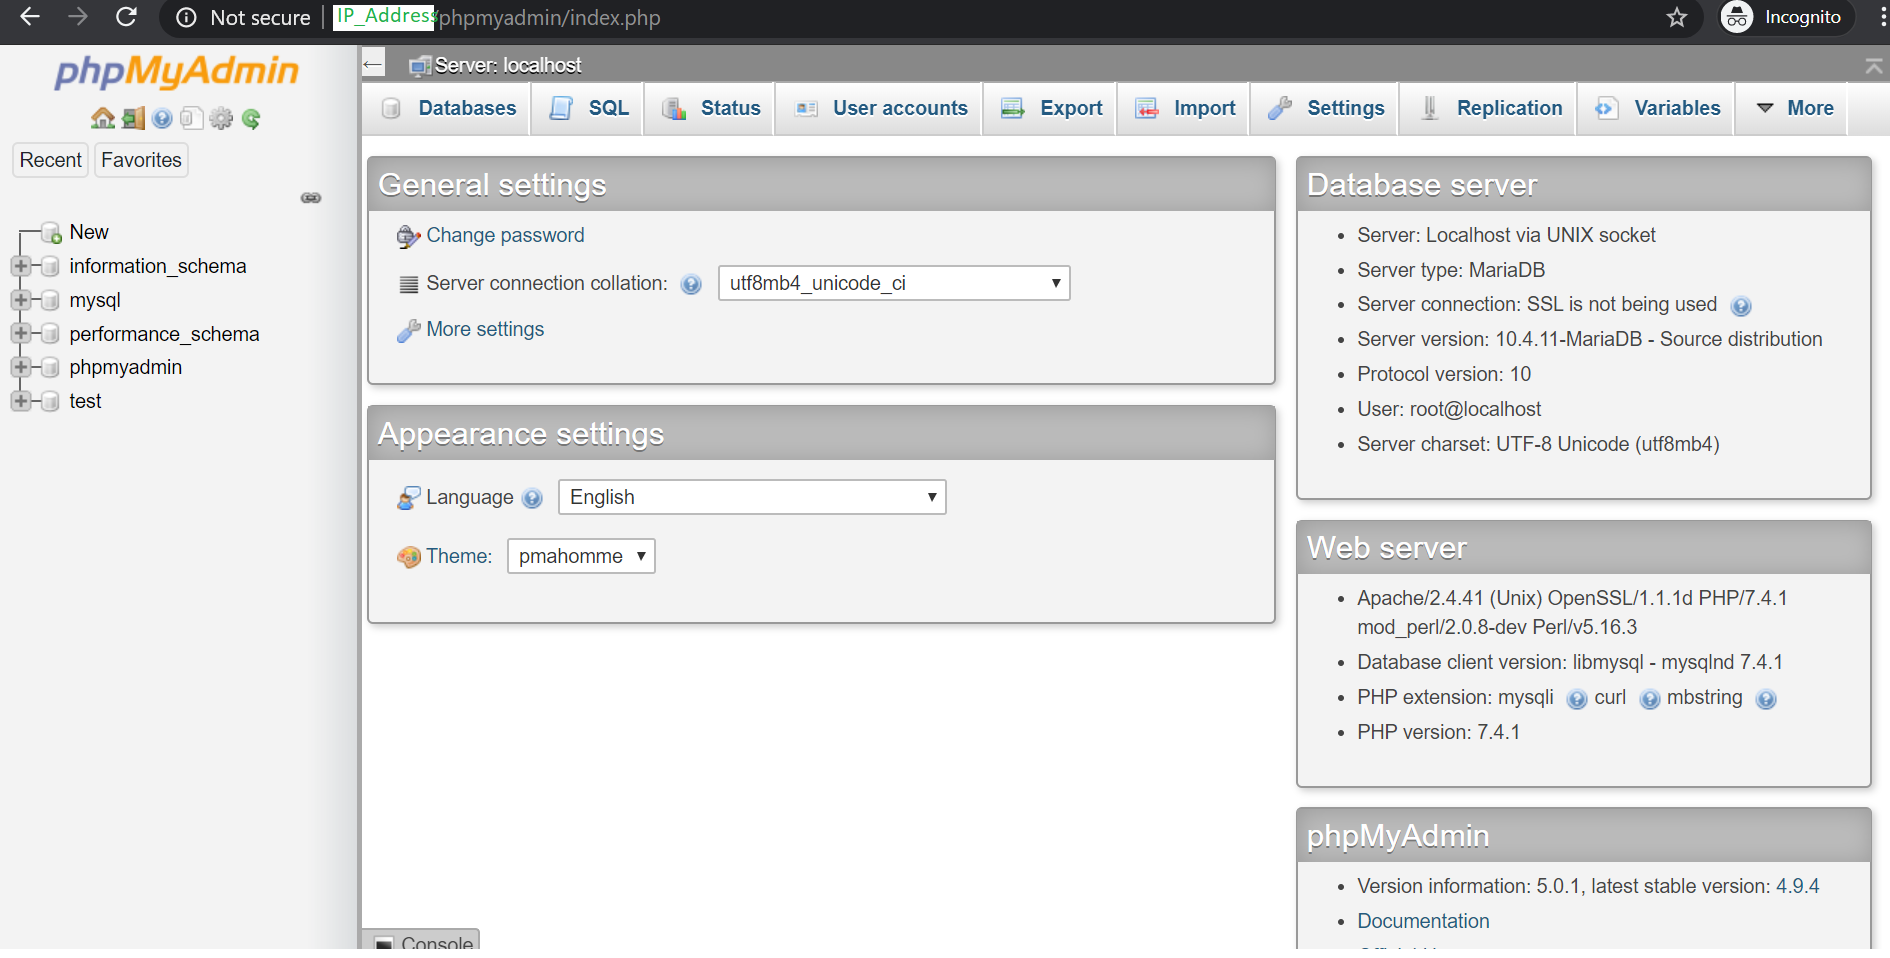
sudo /opt/lampp/lampp restartStep 10:
Now reload the phpmyadmin screen in the browser
Step 11:
sudo /opt/lampp/xampp securityStep 12: Restart XAMPP
sudo /opt/lampp/lampp restartLet’s access phpmyadmin again and see if it is asking for the password:


Thanks for reading, I hope you enjoyed this article.