I Can Help, Here a step-by-step guide:
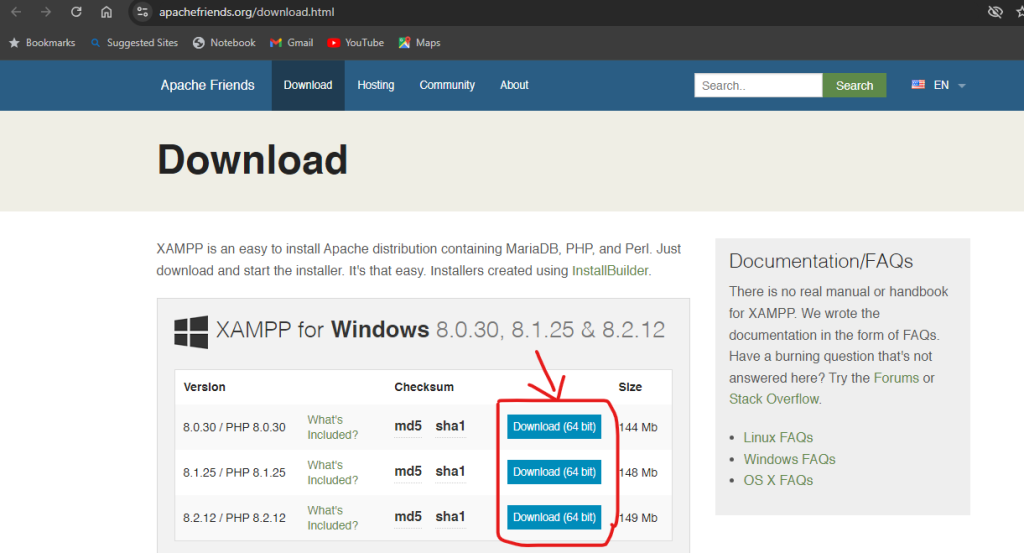
- Download XAMPP
- Go to the official XAMPP website and download the installer for Windows.
- Choose the Windows version that matches your system’s architecture (32-bit or 64-bit).
- Click the “Download” button and save the installer file to your desired location.
2. Run the Installer:
- Double-click the downloaded installer file to start the installation process.
3. Select Components:
- The installer will ask you to select the components you want to install. By default, Apache, MySQL, PHP, and phpMyAdmin are selected.
- Choose the installation directory for XAMPP. The default is usually “C:\xampp”.
- Click “Next” to proceed.
4. Start the Installation:
- Click “Next” to begin the installation process.
5. Complete the Setup:
- Once the installation is complete, click “Finish” to close the installer.
- Once the installation is complete, you can start the XAMPP Control Panel.
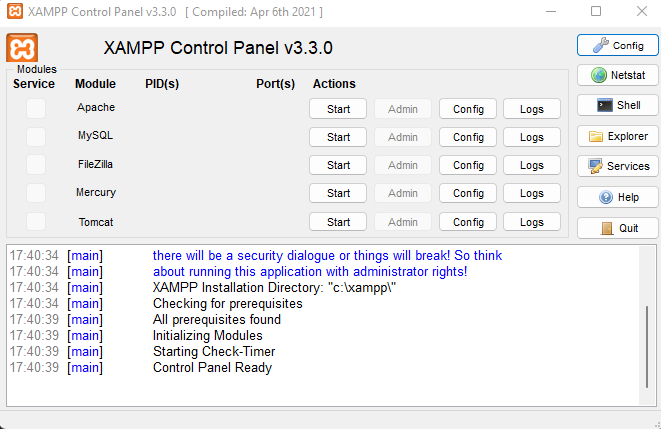
6. Start Services:
- In the XAMPP Control Panel, click “Start” next to Apache and MySQL to start these services.
- Start the Apache and MySQL services by clicking the respective “Start” buttons.

7. Test the Installation:
You should see the XAMPP welcome page, confirming that the installation was successful.